
CLASS IS IN SESSION!
TUESDAY SEPTEMBER 25TH 6PM-8PM
SUNDAY SEPTEMBER 30TH 5PM-7PM
*SPACE IS LIMITED, SO SIGN UP TODAY!*
Well, it’s that time of year, and I’m back on the proverbial horse. I had myself a gosh-darn wonderful summer, but now school’s back in session and my summer ideas are finally starting to take physical form.
Which brings me to my first serious, down-and-dirty foray into bookbinding, trad.-style.
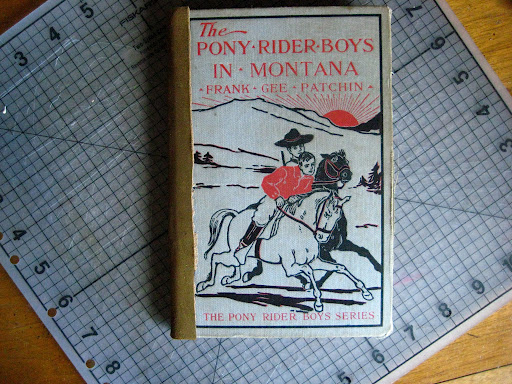
It all started with my boyfriend’s birthday. I wanted to give him (along with a homemade dreamcatcher, stay tuned for that tutorial) a book of love poems. It seemed like a no-brainer, to buy “The Book of Love” from my all-time favorite poet, Rumi. But when I got home with it and started flipping through, I was thoroughly disappointed with the selection, and even some of the translations. So I pulled out my handy-dandy laptop and started compiling my own collection.
I used Pages, Apple’s word processing program, which worked like a dream. To make your own book, be sure to start with a blank canvas, as opposed to a blank word processing document. It makes moving things around and changing page order super easy.
But remember! Pages should be not be printed in standard numerical order, because of the way the book is bound!
The text block of a traditional hardcover book is made up of multiple “signatures”. A signature is a small grouping of pages that are folded together:
 |
| Signatures |
I used signatures of 3 full sheets of paper, when folded this translates to 12 pages (front and back). If you are making a book (as opposed to a blank notebook), each page of your document (don’t forget, we’re in landscape, not portrait!) should translate to two pages in your book. For three sheet signatures and double-sided pages, follow the guide below for each signature. Also be aware that in binding the first and last pages of the text block will be glued to the inside cover, so at the least, your very first 2 and very last 2 pages must be left blank.

 |
| Folding |
 |
| Assembling |
 |
| Assembled signatures |
 |
| Tabs lying on top of one signature |
 |
| Text block ready for binding |


 |
| Knotting the first two signatures together |


 |
| My sweet book |
 |
| Cutting the covers off |

Now, put the book’s old innards aside. Especially if it has interesting pages inside, I like to choose two to glue to the inside covers, or save them for other art projects. (** See below for a side note about other recycled book projects.)
For the spine, if you’re a lucky duck like me, perhaps you happen to have some scrap leather or suede lying around. If not, you could also use fabric, but it should be a nice tight weave, cut on the bias to prevent fraying. If you can find it, you could also purchase some bookbinding spine tape.
Measuring your spine is very important. You need to leave just the right amount of space, and no more for a good-looking book. Measure the thickness of your text block and your covers:
For example, my text block was 3/8″ thick, and my covers were 1/8″ thick a piece. Multiply the thickness of one cover by 3, to account for both covers, and some ease. For me, this equals 3/8″. Added to my 3/8″ text block, I have 3/4″. This is the size of the gap you will leave between the two covers. Add however much overlap you want on the front cover to your figure (I stuck with 3/8″ on either side, so I added 3/4″ to the width of my leather strip, 1 1/2″ final width).

Because accuracy here is rather important, mark the inside of your spine so you know exactly where to place your covers when you glue.

Give your spine covering a nice even coat of glue and place the covers along the marked lines. Give them a good press, and make sure they’re relatively steady before continuing.

Now for the big glue! Coat this entire surface with a thin, even coating of white glue. The entire inside front and back covers, and the inside of the spine.
Carefully place your text block evenly down the center of the spine. Press your tabs down onto the glue, and add a touch more glue on the clean surface of the tabs. Now press the first and last pages of your text block onto the inside covers, doing your best to squeeze out air bubbles. Be sure to clean up any glue that squeezes out before returning your book the bottom of that pile of heavy books to dry under pressure.

Finally, if you want decorative inside covers, you can do that now (or for that matter, any time in the future). I glued in some great illustrations I snatched from the old book’s contents.
 |
| Left: “The Boys Gave Three Cheers for the Flag.” Right: “The Lad Hurled the Mountain Boy Over His Head.” |
And once everything’s good and dry, you’ve got yourself a beautiful new hand-bound book!
 |
| My finished book |

 |
| Watercolor and pencil on top of a poem entitled “April” |
I’m back from my annual summer getaway and feeling refreshed and better than ever.


The response to my classes at the Brooklyn Brainery have been so overwhelming! Thus, I’m very excited to announce my upcoming plans to teach community tailoring classes. I hope to launch the first class in late August (after I return from my annual month-long retreat to the Berkshires) at a Brooklyn coffee shop, TBD.
These will be casual, open classes. Everyone can walk away with something useful, whether or not you have a sewing machine at home and no matter your level of experience. Beginners can come for an introductory crash course; the more advanced can come for individualized advice on altering specific garments. Bring your ill-fitting clothes, and I’ll provide the rest. Cost is pay-what-you-wish, suggested donation $20.
Subscribe via email with the form in the right sidebar if you’d like to be notified about upcoming classes.
Cheers!
Melody
The good news: business is picking up! I feel like I’ve been giving out my business cards left and right.
The bad news: my business cards are terrible, ugly, no-longer-correct VistaPrint freebies. Giving out my business card is always accompanied by a pang of shame.
What it all means? Time to make myself some sick business cards.
So I called my mom and asked her to dig out my old Print Gocco, a super-cool small-scale Japanese home screen printing system.
I started by drawing out my design in pencil:

Then, I went over it with a carbon-containing pen:

I picked up some business card blanks in a few different colors at Paper Source…

… burned and inked my screen…


And I’m in business!
Cheers,
Melody
A few weeks ago, my 2005 iBook finally croaked. Years I’ve been waiting for it to die so I could upgrade without guilt. And while browsing the Mac Store case selection, hugging my brand new MacBook Air I thought, “$45??? F-that. I can make my own G-D case.”
 |
| My own G-D case |
True, I don’t have the fancy neoprene, but there are other ways to protect a laptop, right?
The following week I was in Park Slope and spied some beautiful hand-quilted pillows in the window of a home furnishing store. I couldn’t find any terribly similar images online, but something along these lines:

Your laptop needs a little padding (I assume, since laptop cases always have it… When it comes to technology, I mostly have no idea what I’m talking about). Who needs neoprene when we have QUILTING!
A quilt is like a sandwich. Fabric is the bread and batting is the good stuff.
I pulled out some Guatemalan ikat to be the face of my case and some basic whatever for the backing (I also lined the case, so the backing will never see the light of day).
Cut your pieces the size of your computer (or whatever it is you may be making a case for) plus 1 1/2″ all the way around to account for ease and seam allowance.

(Pay no attention to the pathetic girth of my batting. I ended up combining this batting I had laying around with a layer of stuffing that I also had laying around. If you’re buying batting, get some nice fluffy stuff, at least 1/2″ thick.)
 |
| Quilt Sandwich |
Now you sew your sandwich together. There aren’t really any rules for this, sew it any which way you please. By hand, by machine, in stripes, zig-zags, diamonds, around the shapes in the pattern of your fabric. The world is your oyster! I hand-quilted mine with stripes to reiterate my striped fabric, using four different thread colors that coordinated with the colors in my fabric.

I like the hand-made aesthetic of purposefully imperfect stitching.

Once I finished quilting both sides of the case, I dug out a colorful zipper (long enough to go around the top corners, so getting your computer in and out of its case isn’t infuriating) and a lightweight lining (to hide the yucky innards)…

And assemble!
You know how to do that, right? My apologies to anyone who actually wants to know… I didn’t document it and I don’t have the patience to type it all out at this moment. Surely there are other helpful resources out there…

Happy quilting!
Melody


